
Effortless Eye Movement: Two Ways!
- Steph

- Nov 13, 2020
- 9 min read
Updated: Jul 7, 2021
PART ONE: TRACKING A TARGET
Using Unity Version 2019.4
There are a few creative hills I’m willing to die on, no matter how basic the game is. One of those hills is eye movement.

At the very least, eye movement can direct player attention, but there’s much more to it than that. In reality, our eyes also convey focus, personality and emotion; we abandon a crucial human element if we negate that in our character design. In fact, a character staring lifelessly in one direction can hurt immersion significantly.
So for me, eye movement is a must. And fortunately, it’s quite simple to implement.
The Problem
Your character has dull, lifeless eyes. You want them to look at points of interest or look around their surroundings, but they only stare blankly ahead.
The Solution
This is the first in a two-part tutorial that will go through two different ways to tackle eye movement: 1) Using eyes that are rigged to bone transforms, and 2) using an offset on the texture UV for the eyes. In part one, we'll set up our movement system and implement a function to track targets. In part two, we'll get a bit fancier.
Obviously, there are exceptions to the below criteria, but basically, you will want to use:
Eye bone transforms
If your character has separate eye meshes rigged and weighted to bones, and
The eye meshes are spherical
Texture UV Offset
If your character has eye meshes that are not rigged to bones, or
The eyes are part of the character mesh, but have their own material, or
The eye meshes are flat or non-spherical
Before we get into specifics, let’s break down how these approaches work differently.
Transforms:
Unity’s API includes an interface that will point a transform at another transform. Specifically, the animator.setlookat functionality rotates a transform's forward direction (which should be the front of the eyeball) to “look at” another transform (the target).
UV Offsets:
This process offsets the texture rather than rotating a mesh. Based on the target position, it will offset the texture on it's x and y axis so the eye appears to be looking at a target.
If you have the transforms, or plan to use blendshapes instead of UV offsets, there are several high-quality assets on the store that take care of eye movement for you. My favourite is Realistic Eye Movement, but there are many others. Lipsync Pro, for example, includes an eye controller in addition to lipsync functionality. So if you want to abandon this tutorial and use one of these assets, you can pick them up here:
However, if you want to do it yourself, keep reading.
Animator Controller Setup
I’m going to make use of the animator for both methods in this tutorial. Mainly because I like to keep things that move the character in one place. Also, by dedicating a layer to eye movement, we can sync it with our other character animations.
Why would we do that? Well, if your character is running forward, they’re likely just looking ahead, so you don’t need to bog down your update function with eye movement calls. But when they are near a point of interest, or in a fighting stance, you want to be looking at the target. If they’re standing idle, they might just be looking at random points. And finally, if they’re in a dialogue state, their eye movements would ideally correspond to their state of mind. Thinking, shyness, anger, and so on — all would be expressed through different eye movements. In the part two of this tutorial, I’ll show you how to expand the scripts in this part with coroutines for some of those uses.

Begin by creating a new layer in your animator called “EyeMovement” or whatever you like. This layer will use an avatar mask for just the eye mesh, the head bone and the eye bones, so cancel out the entire humanoid form and import your character’s avatar to the Transform field.
The layer should override the other layers and have the IK Pass enabled.
We'll set up states for eye movement, even though they contain no actual animation clips. (All we really want is for the states to initiate the appropriate eye behaviours.)
The first state is an empty default state that I’ve called “DefaultEye”. It will not need an animation behaviour since it’s going to serve as the resting state for our eye movement system. When we return to this state, our character will not be tracking any targets with their eyes.
However, the next state is for when the character is looking at and tracking a target with their eyes. I’ve called this state “LookAtTarget” and this is where I’ll start setting up the animation behaviour. The behaviour scripts will be different depending on the method of eye movement you choose.
Lastly, for testing purposes, go ahead and create two trigger parameters, one called DefaultEye and another called LookAtTarget. Use these triggers as the transition conditions between the two animation states.
Eye Movement With Bone Transforms
What you need:
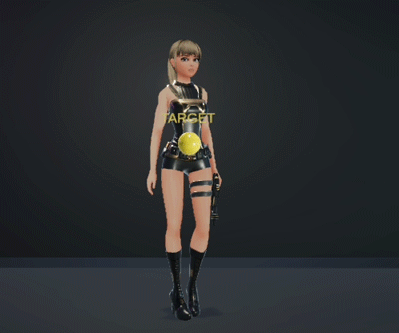
A character with separate eye meshes rigged to eye bones. I’ll be using my sci-fi version of Scarlett Riley.
Our first method will go through the code for using eye transforms, since that’s the easiest one to manage. Practically everything you need for eye movement is already built into the Animator.SetLookAt interface.
The Eye Rig
Start by creating an empty child under the Head transform and call it EyeRig. This will hold all of the reference transforms for our look system and is increasingly important in the next part of our tutorial. For now add a child called DefaultLookTarget. This will be our characters resting look target so position it as closely to a natural position as possible.
Now create a new script called “EyeMovement” or whatever you prefer. This is where your animation behaviour will grab references to the look targets, but because most of the coding involves floats that can be cast directly through the animation behaviour, it will remain pretty bare bones. It simply needs to contain parameters for your targets and your character. I’ve also added a function that takes a Transform parameter to set up new targets to look at.
This is my EyeMovement code so far:
Go back to your scene and populate the fields in your script. If you run the code now, you’ll notice that (drumroll please)…it won’t do anything. We have some work to do with our Animator first.
We've already created our DefaultEye and LookAtTarget states. Leave the Default state alone and select the LookAtTarget state. Add a new behaviour script to the state. I’ve called mine “LookBehaviour”.
The parameters we need to make the system work properly will include a reference to our eye movement system and floats for the lookat weights.
So with that in mind, let's expose the OnStateEnter function so we can grab a reference to our eye movement script when we enter the LookAtTarget state. We'll also expose the OnStateIK function to enable the actual magic behind the looking system. All we have to do is use the Animator.SetLookAt interface to lock onto the target referenced in our EyeMovement script. You can then play with the weights we’ve left exposed on the behaviour to get the look you like.
Lastly, set the look target back to the default position in OnStateExit.
Here’s the full LookBehaviour script.
Now, either set the LookAtTarget state to be default, or trigger the animation state with a menu button to test it out. You can see that the characters eyes will follow the target. If we go back to the default state, they will revert to their original rotation and stop tracking the target. It’s pretty simple.

NOTE: The limit on the eye range can be controlled by the weight and clamp values of animator.SetLookAtWeight. You'll want to play around with it to see where it fits best, which is why we left the parameters exposed. The great thing about this is that you can include subtle head and body weights in addition to eyes.
Eye Movement With UV Offsets
What you need:
Any character with eyes that have their own material reference. I’ll be using my sci-fi version of Scarlett Riley.
Our setup for this system is a bit more complex than using eye transforms. We can't just get our offset calculations directly from a lookat system, because we're trying to translate the target position to the x and y values of a 2D texture. So what we're going to do is create a rig that captures where the eyes would be facing if they were looking at a target, and then use that position to calculate our texture offset. The easiest way to do this is to take advantage of the Transform.LookAt API.
Here's my thinking: Basically, the eye rig holds a child object. When we ask the rig (parent) transform to "look at" a target, the child's local position becomes our reference point. However, if we just grab a reference to the child objects local position, then we will always get zero, since it's a child of the rig, which has rotated, not changed position. Instead, we'll calculate the child objects local position using the head transform as the parent.
With that in mind, build your eye rig. Start by creating a child gameobject on the head bone of your character named EyeRig_Holder. This can be a primitive if you want to be able to judge the positioning, just remember to disable or delete the renderer. You'll want this centered between, and a few units ahead of the characters eyes. Next, create a child of the EyeRig_Holder called ChildPosition. Move this child a few units infront of the holder. (Think of the holder like a cone, where the apex is pointed at the child.) Now duplicate this object and drag/drop it to be parented to the head, rather than the rig. Call this one "DefaultEyePositon".
Now for our monobehaviour. Create a new script and call it "EyeUVMovement" or whatever you like. Here's how the code will look:
That's a lot of parameters. The Eye Rig parameters are self explanatory, since we just built them, but let me break down why the others are needed.
mainArmature: The Armature parent for your character rig. The look weight for the texture offset is going to be dependent on scale. We use this to get the scale needed to calculate an appropriate weight multiplier.
head: The head transform for your character rig. This will be used to calculate the local position of the rig's child object.
eyes: This references the eye mesh. We'll use it to get a reference to the...
eyeMat: The material for the eye mesh. This contains the texture that we will be offsetting.
lookTarget: The target we want to look at.
defaultTarget: A permanent default target reference for our eyes zeroed out state. (This is not the same as our DefaultEyePosition child object.)
lookWeightMultiplier: This will help us calculate the offset amount (see mainArmature).
lookOffset: The texture offset values we will be manipulating.
Go back into your project and populate all of the values accordingly. If you run the scene now it won't do anything. We still have to create our behaviour script to manipulate the values.
We've already created our DefaultEye and LookAtTarget states. Leave the Default state alone and select the LookAtTarget state. Add a new behaviour script to the state. I’ve called mine “LookUVBehaviour”.
The parameters we need to make the system work properly will include a reference to our eye movement system, a Vector2 to represent the offset value, and floats for the offset limits. You can get your limits directly by going to the eye mesh material and manipulating the x and y values on the texture to find the ranges you're happy with.
In the OnStateEnter function, grab a reference to our eye movement system.
We'll also expose the OnStateUpdate function. This is where we'll ask our eye rig to "look at" our target, translate the world position of our child object to the local position of the head transform, and then set our texture offset within the limits we've cast. How do we get the local position relative to a different parent? With InverseTransformPoint, which takes a world position of a point and converts it to a local position, based on the parent you've indicated.
Lastly, in OnStateExit we will ask the eyerig to look at our default position again and zero out the texture offset.
Here’s the full LookUVBehaviour script:
Now, either set the LookAtTarget state to be default, or trigger the animation state with a menu button to test it out. You can see that the characters eyes will follow the target. If we go back to the default state, they will revert to their original rotation and stop tracking the target. It’s pretty simple.
The drawback here is that we don't get the subtle head and body movements that are built into the IK system. You could set this up following the tutorial for bone transforms above, but only using the head and body weights. I haven't tried it, but I would expect that it would work as intended.
Wrapping Up
You should now be able to implement this system to track targets. Remember in the monobehaviours, we included a public function to set the target. You can call this function through any method that will accept a transform as a parameter -- buttons, collider triggers or mouse events (like clicking on hotspots) are all good ways to use it.
In part two, we'll cover off how to extend our eye movement rig and code to include coroutines for random looking and smoother transitions to and from a target!
Quick Resources
Used in this article:


Comments